High-speed, roll to roll coherence scanning interferometry in a laser texturing process
Carlos has collaborated since 2010 on the development of confocal, interferometry and focus variation technologies at Sensofar, where he holds the R&D Engineering Manager position since 2018. His interests are Optomechanical Systems Design and Image Processing.
Its consolidated research work in optical engineering confer the Sensofar R&D group an outstanding position to always stay up-to-date in terms of innovation and the highest technological level.
High-speed, roll to roll coherence scanning interferometry in a laser texturing process, publication
Carlos Bermudez1, Pol Martinez1, Cristina Cadevall1, Roger Artigas1
Sensofar-Tech, S.L., (Spain)
June 2019
Euspen 19th International Conference (Bilbao), SHARK – Surface Texturing and Functionalization
Abstract
Surface engineering is a crucial technology in many industry sectors. It consists of adding functionality to a surface by coating or texturing it. Currently, coating technologies are mature and well established, but coatings suffer from limited durability and poor sustainability. Laser surface texturing is nowadays emerging due to the latest improvements in high resolution, excellent repeatability and keeping the process non-contact. However, associated costs with the laser texturing system and low throughput are still to improve. In such a process, quality assurance is mandatory. A surface characterization procedure needs to take part of the full process without impacting the cycle time. These premises can be attained using a non-contact, optical 3D profiler integrated with the laser texturing machine. We have developed a miniaturized optical sensor head that integrates Coherence Scanning Interferometry (CSI) as the measuring technique with interchangeable optics, allowing to adapt the lateral resolution to the laser texturing process. Interferometric measurements are carried out using dual-wavelength illumination, granting measurements from 25 µm/s with 1 nm of system noise to more than 200 µm/s with less than 100 nm of system noise. Reduced dimensions of the sensor head make possible to integrate it inside the laser texturing machine without interfering with the laser texturing process, even parallelizing both texturing and measurement. Together with feedback analysis and finite element modelling, a closed-loop manufacturing scheme is achieved.
1. Introduction
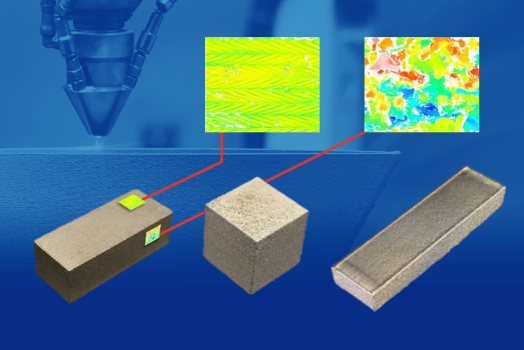
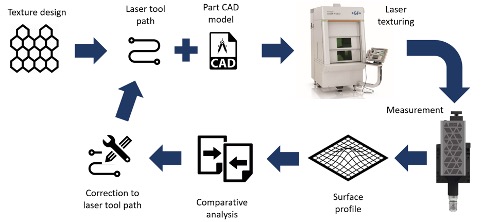
As a form of surface engineering, laser functional texturing is a key enabling technology that is relevant to almost every industrial sector, with applications ranging from anti-icing, self-cleaning surfaces to wear reduction and biocompatibility enhancement. It can offer significant benefits to manufacturers, such as cost savings, improved product performance and faster product development. However, the process is viewed by many as complex and costly, which involve huge design of experiments to get the desired surface texture. To face such a challenge, a fast and accurate quality control (QC) stage, as in most high precision processes is a must. In advanced manufacturing, a perfect example would be Roll to Roll (R2R) techniques, where high throughput and low cost are required. According to Industry 4.0 trend, QC can be integrated into the manufacturing process giving feedback for close-loop manufacturing and establishing real-time knowledge for a data management system and modelling software. This is currently being pursued by the SHARK project, depicted in Fig. 1. SHARK (Laser surface engineering for new and enhanced functional performance with digitally enabled knowledge base) project will unlock the potential for laser texturing for the generation of functional surfaces by boosting the productivity, efficiency and flexibility of the process. The rest of the paper is organized as follows: in section 2, the methodology is described. Section 3 shows the results on real measurements implementing the explored method whereas section 4 presents the conclusions.
2. Method
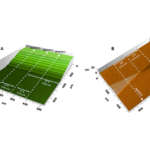
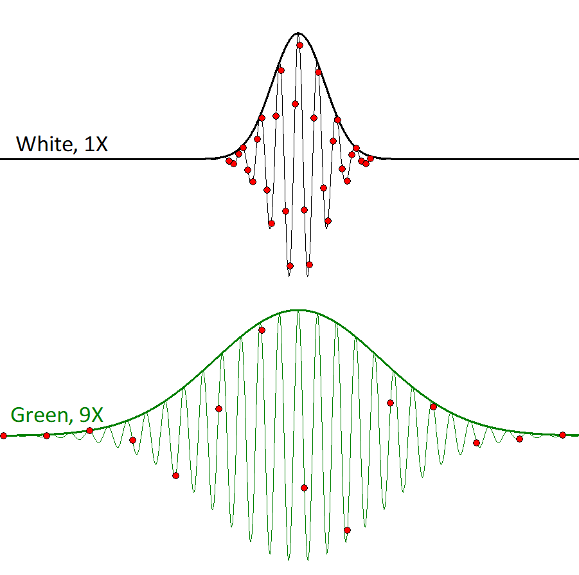
The chosen technology that enables non-contact, high accuracy and high speed measurement is Coherence Scanning Interferometry (CSI) [1]. CSI features an extremely good vertical resolution (down to 1 nm). However, it requires a dense Z scan to extract the areal information. This is due to the short coherence length of the white light source, intended to maximize the measurement repeatability. To overcome this limitation, a light source with narrower bandwidth than white light has can be used to have a wider correlogram, and then increase the scanning speed but still getting enough measured data (Fig. 2). This allows the sensor to measure at higher speed (up to 9 times the original speed with the same frame rate).
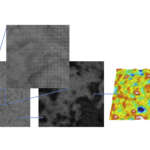
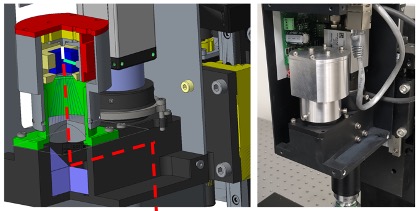
This technology has been implemented into a Sensofar commercial 3D optical profiler using CSI and white light epi-illumination (Fig. 3). Green and white optical beams are mixed through a beam-splitter. The measurement light source is automatically enabled according to the selected speed factor. White LED for 1X and 3X, Green for 5X, 7X, and 9X. Speed ranges from 24 µm/s to 219 µm/s at 340 fps, VGA resolution.
3. Results
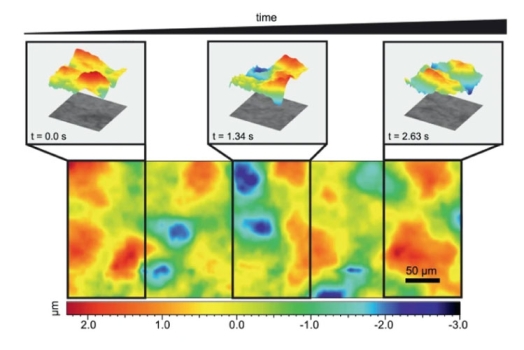
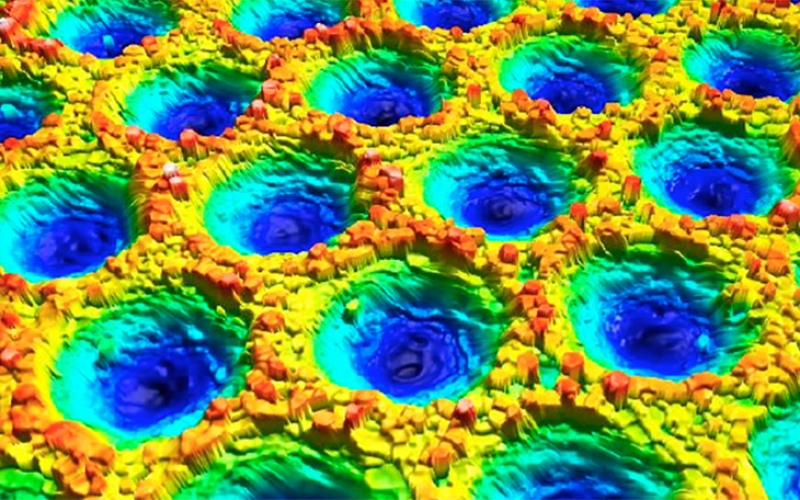
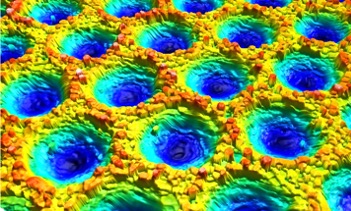
According to the measurement speeds described in the former section (up to 219 µm/s), a 3D topography of a variety of typical samples usually measured with interferometry can be obtained in less than 2 seconds. An example of a laser texturing application obtained with such a method appears in Fig. 4.
The repeatability of the system with both light sources at typical speed (factor set to 1X) and maximum speed (9X) has been studied with the calibration specimen Areal Irregular (AIR) B40-P1F from the NPL. Its calibration values are depicted in Table 1. Measurement settings, instrument noise obtained according to the ISO method and statistical results of AIR B40-P1F specimen are presented in Table 2.

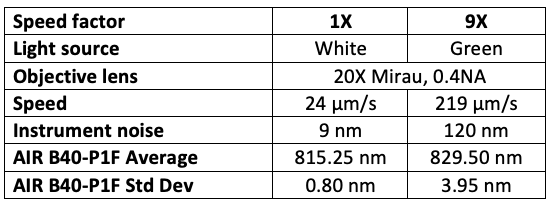
The results depict a noise increase proportional to the speed rise, although it is still low to applications that demand speed rather than precision. Values have been obtained without vibration isolation, similar to a precision laser texturing environmental conditions. With proper vibration isolation, system noise can decrease down to 1 nm at 1X speed and below 100 nm at 9X speed.
In terms of accuracy, it can be calibrated as stated in ISO 25178 with an “Amplification Factor”. According to the results, accuracy varies implying that possibly every measuring speed must have a different amplification factor. We will study this effect in future work.
4. Conclusions
A custom made, fast interferometer has been built for measuring, with high speed, into a laser surface texturing, close-loop application. The sensor, by the use of Coherence Scanning Interferometry with white and green light sources, allows the system to measure up to 219 µm/s with 120 nm of system noise.
A repeatability test with a standard calibration specimen has been performed. Results point to calibrate each speed with a different calibration (amplification factor), which will be investigated in the future. The setup enables a roll to roll application to obtain a single measurement in less than 2 seconds, and use such data to quickly readapt process parameters or even re-texture the sample to meet the specifications.
Acknowledgements
This project has received funding from the European Union’s Horizon 2020 Framework Programme for research and innovation under grant agreement no 768701.
References
[1] de Groot P 2011 Coherence Scanning Interferometry in “Optical measurement of surface topography” (Springer), Berlin, 187-206.
[2] ISO 25178-700, Geometrical product specifications (GPS) — Surface texture: Areal—700: Calibration, adjustment and verification of areal topography measuring instruments.


