ISO 25178 STANDARD
ISO STANDARD
Surface texture characterization
The ISO 25178: Geometric Product Specifications (GPS) – Surface texture: areal standard is an International Organization for Standardization collection of international standards relating to the analysis of 3D areal surface texture. It is the first international standard taking into account the specification and measurement of 3D surface texture, and in particular defines 3D surface texture parameters and the associated specification operators.
The ISO 25178: Geometric Product Specifications (GPS) – Surface texture: areal standard is an International Organization for Standardization collection of international standards relating to the analysis of 3D areal surface texture. It is the first international standard taking into account the specification and measurement of 3D surface texture, and in particular defines 3D surface texture parameters and the associated specification operators.
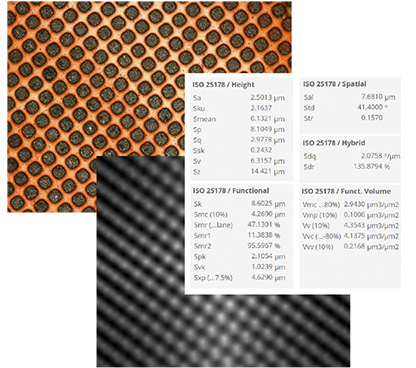
Generally, natural and manufactured surfaces comprise a primary shape or form with varying degrees of structure, waviness, and roughness (2D/3D). These surface features will contain intentional and unintentional (controlled/uncontrolled) contributions.
The application determines these contributions’ relative significance (noting that uncontrolled contributions are not necessarily undesirable). The goal of a measurement is to evaluate – qualify, and quantify – the differing contributions, either in support of a fundamental scientific research finding or about a target industrial application.
Depending on the field or application, the structure, waviness and roughness contributions might be categorized as finish, haptic, texture, defects, marks, micro-wear and much more. Alternatively, the user may be looking to determine critical dimensions, step-height, peak-to-valley, volume or slope, or even map coating thickness and other surface characteristics.
If the goal is to determine areal (3D) surface texture, the results can be rigorously tied to the appropriate parameters defined by the increasingly prevalent ISO 25178 standard. In industrial (surface) manufacturing, adopting best practices tied to widely accepted standards can make manufacturing more efficient, reproducible, and traceable.
Typical applications sectors include general scientific and materials research, automotive, aerospace, consumer electronics, medical technology, tooling and optics & optoelectronics. Specific applications include additive manufacturing, laser, medical implants, molding, optical components, PCB, semiconductors, toolmarks, nano-technology, micromanufacturing, optics.
The sheer breadth of 3D surface and 2D profile metrology tasks across so many scientific and industrial applications points directly to the outright practicality of Sensofar Metrology’s ‘4-in-1’ approach.
SURFACE FILTERING
Terms, definitions and surface texture parameters
For surface texture characterization, filtering is essential to select your scale of interest. The following schemes are based on the definitions included in ISO 25178 part 2 regarding the different types of filters, operators and surfaces applied to areal measurements.
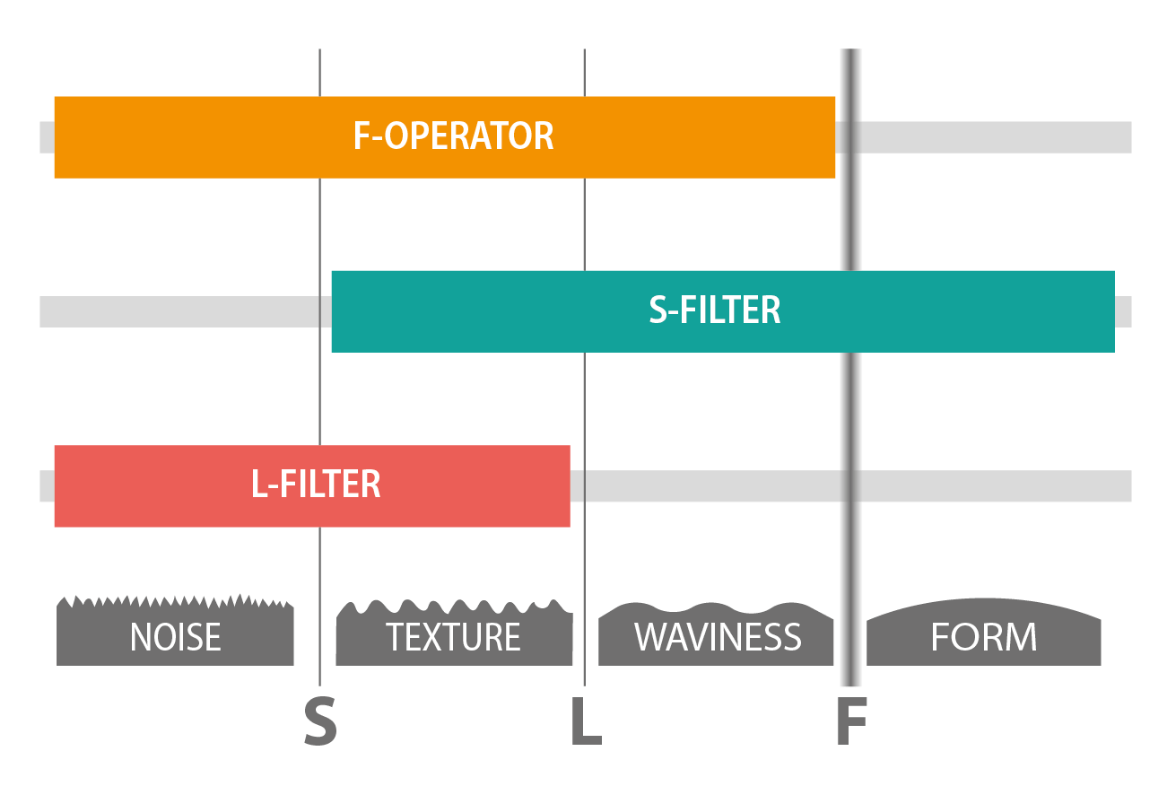
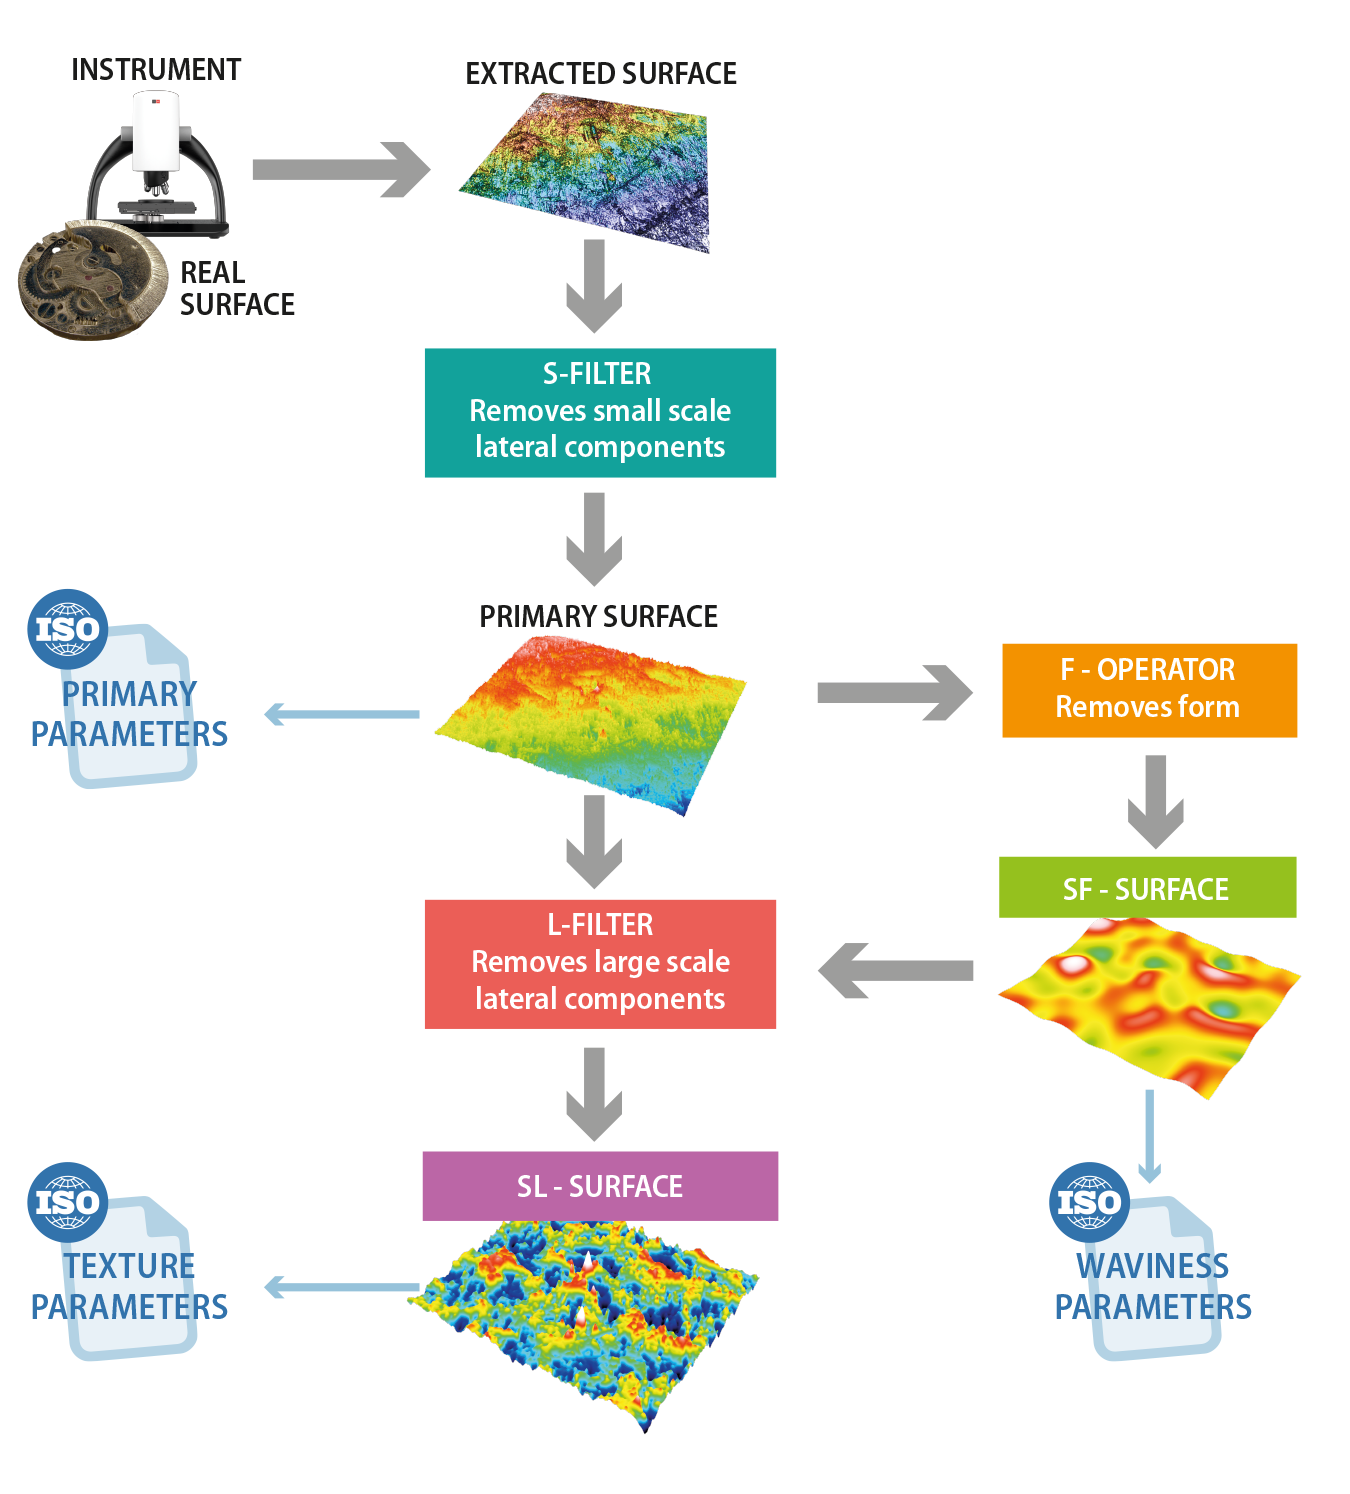
SensoVIEW is an advanced analysis software including surface and profile filtering tools according to ISO standards, being able to select the desired filters and nesting indexes.
SensoVIEW is an advanced analysis software including surface and profile filtering tools according to ISO standards, being able to select the desired filters and nesting indexes.
ALGORITHMS
Metrological characteristics for areal-topography measuring methods
All Sensofar developed technologies have been implemented and fulfill the criteria of ISO 25178 part 6 defined as metrological characteristics for areal-topography measuring methods.
All Sensofar developed technologies have been implemented and fulfill the criteria of ISO 25178 part 6 defined as metrological characteristics for areal-topography measuring methods.
TRACEABILITY
Calibration of surface texture measuring instruments
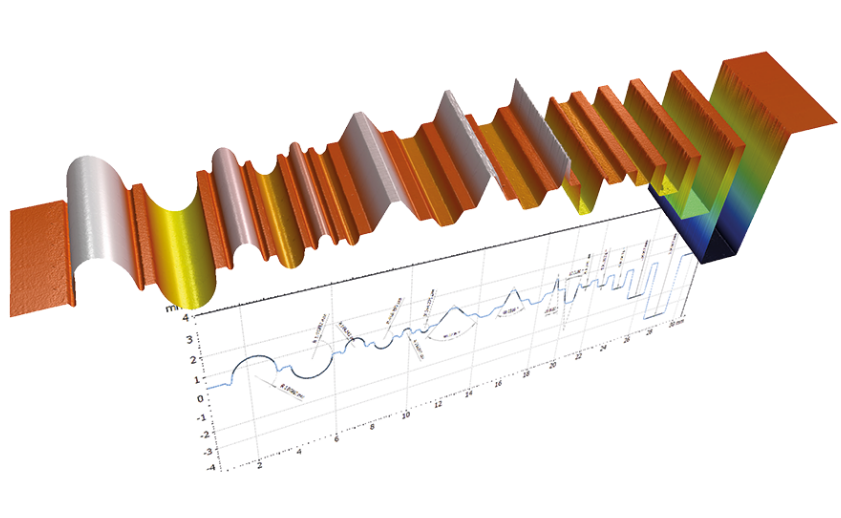
All our systems are manufactured to deliver accurate and traceable measurements. Systems are calibrated using traceable standards following the ISO 25178 guidelines of part 7 for: Z amplification factor, XY lateral dimensions, flatness error, as well as parcentricity and parfocality.
Sensofar ISO membership


Since 2007, Sensofar has been member of the Technical Committee of the International organization for Standardization (ISO/TC213) and has been deeply collaborating in the creation of the ISO 25178 standard.

Highlighted contents ISO 25178
Part 2: Terms, definitions and roughness parameters
Part 3: Specification operators -filters


