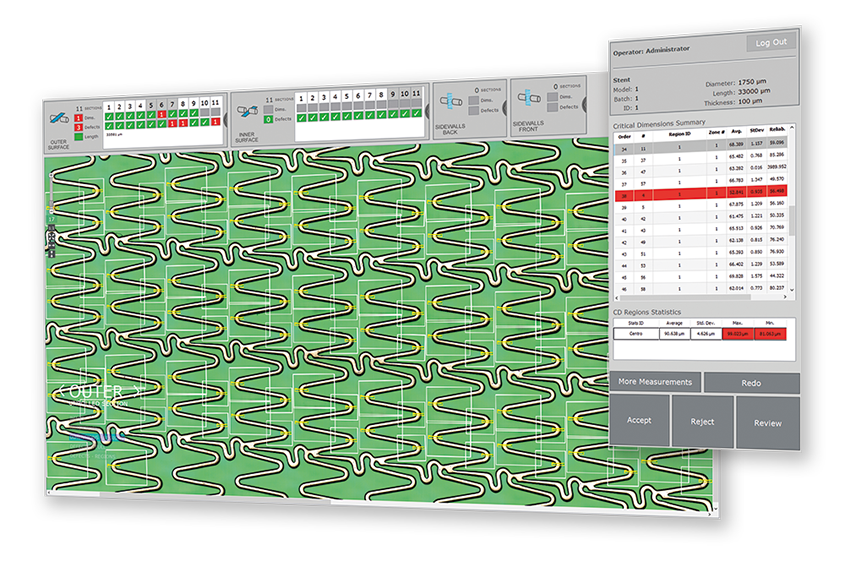
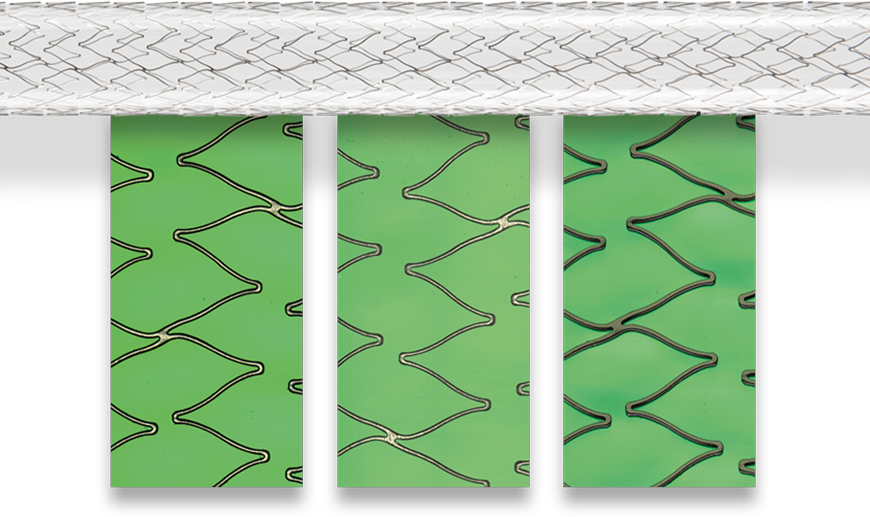
SensoINSPECT can rapidly acquire and analyze high-quality unrolled images of the outer inner and both lateral surfaces of the stents and heart valves.
SensoINSPECT can rapidly acquire and analyze high-quality unrolled images of the outer inner and both lateral surfaces of the stents and heart valves.

Accurate dimensional analysis
Sensofar Medical’s unique technology increases inspection throughput by analyzing images as soon as they are acquired providing immediate dimensional and visual inspection results.
STRUT WIDTH
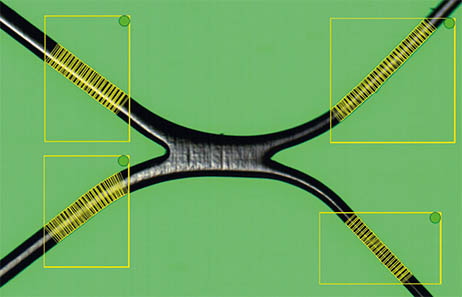
Accurate strut width measures in Regions of Interest
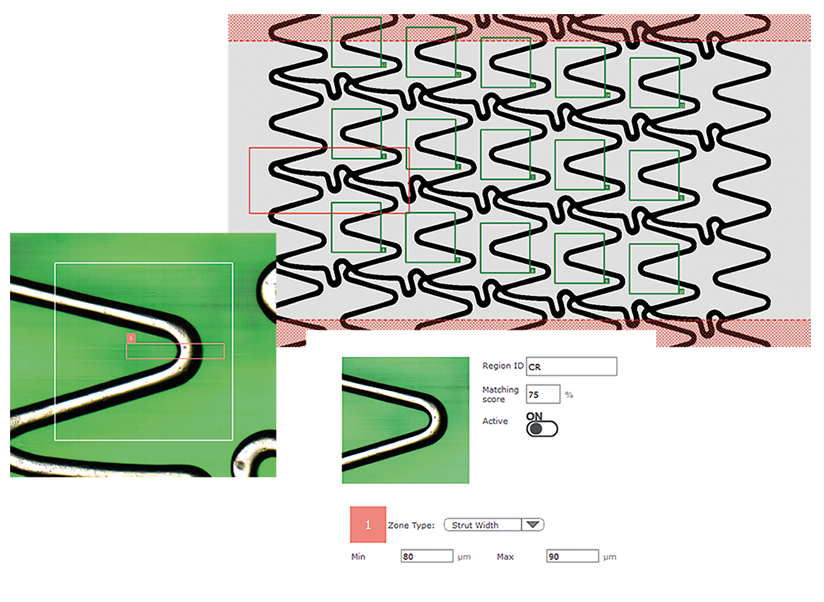
SensoINSPECT algorithms use sub-pixel resolution to perform strut width measurements at any point of the stent. The strut width can be automatically measured in the defined regions of interest.
Dimensional analysis results are obtained with a repeatability of +/- 1µm RMS and +/- 3µm P-V. This information is overlaid onto the unrolled images with a green/red flag that indicates whether the dimensions are in or out of the accepted tolerance range, hence allowing immediate decisions to be made.
WALL THICKNESS
Non-contact wall thickness measurement
The strut wall thickness and curvature edge radius are optically measured in the regions of interest defined. A proprietary correction model is used to obtain accurate measurements based on the image acquisition speed and the illumination and observation angles.
The strut wall thickness and curvature edge radius are optically measured in the regions of interest defined. A proprietary correction model is used to obtain accurate measurements based on the image acquisition speed and the illumination and observation angles.
INTER-STRUT ANGLES
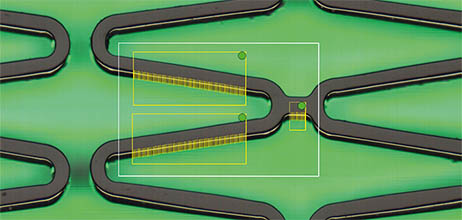
Measurement of angles between struts
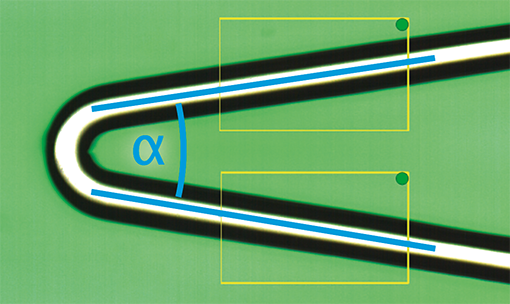
Measurement of angles between any pair of struts is automatically performed by SensoINSPECT with high accuracy, allowing the detection of local deformations in the stent structure.
STRUT EDGES
Characterize polishing uniformity
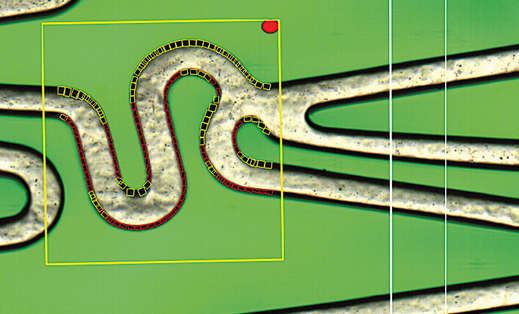
SensoINSPECT software simultaneously identifies the edges of struts in unrolled images and uses dimensional analysis to provide an accurate assessment of the width of these edges, related with the roundness or sharpness of the stent after polishing.
SensoINSPECT software simultaneously identifies the edges of struts in unrolled images and uses dimensional analysis to provide an accurate assessment of the width of these edges, related with the roundness or sharpness of the stent after polishing.
Automatic visual inspection
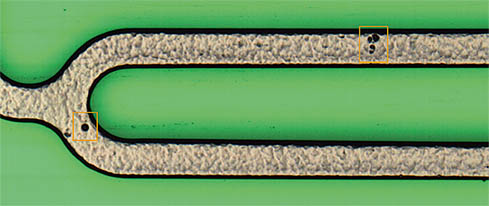
Defects are automatically detected in parallel to dimensional measurements at any surface of the device providing a complete inspection in a single operation.
SURFACE DEFECTS
Find defects coming from the polishing process
The proprietary detection methods in SensoINSPECT software allow to automatically highlight deviations from the ideal surface of the device, based in their size and contrast. Detection methods for small and localized defects, as well as for large defects affecting an extensive area of the surface, are available.
Surface defects can be detected in the outer, inner and lateral surfaces of the stent.
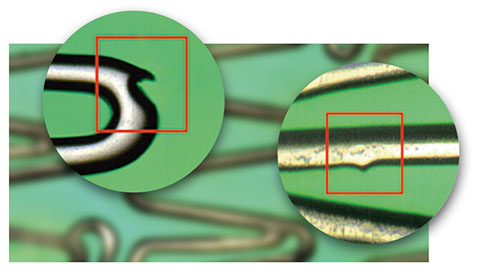
CONTOUR DEFECTS
Find defects coming from laser cutting process
SensoINSPECT is able to automatically detect defects in the contour of the device by finding unexpected abrupt changes of the contour of the devices, and deviations from the specified dimension of the struts.
A warning for the operator is showed based in the configured tolerance for the reference dimensions and curvatures.
STRUCTURAL DEFECTS
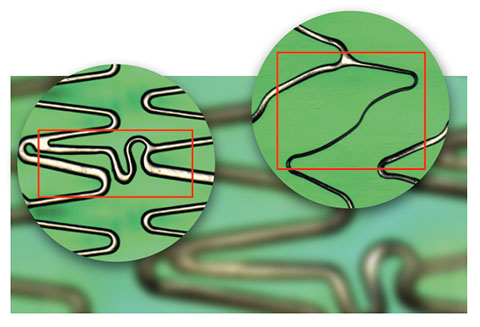
Find deformation and big-scale defects
SensoINSPECT is able to detect structural deformations in the stent based on its reference design. This allows the detection of large-scale deviations from the ideal stent design.
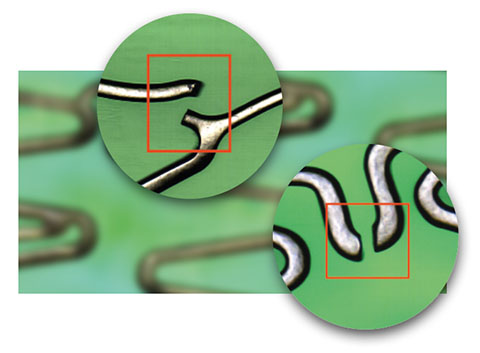
STRUT FRACTURES
Find broken struts
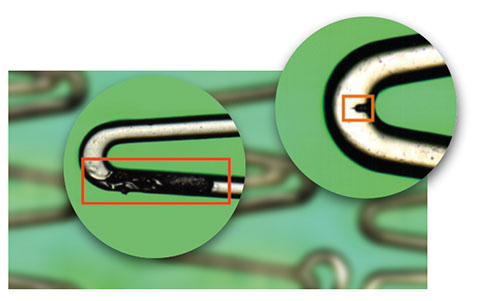
Being the most critical of the defects appearing in production, strut fractures are automatically detected by robust detection algorithms in SensoINSPECT.
Being the most critical of the defects appearing in production, strut fractures are automatically detected by robust detection algorithms in SensoINSPECT.
Surface finish characterization
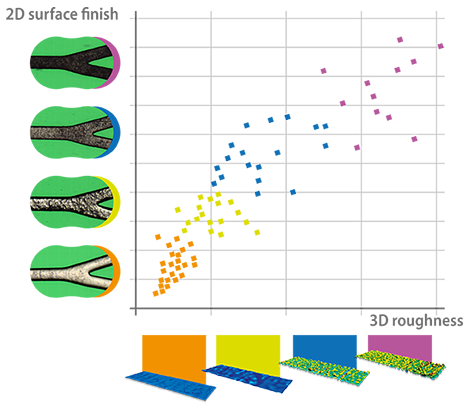
The exceptional combination of 2D and 3D technologies in Q six allows a direct correlation of a 3D roughness measurement in the surface of the device with a 2D image of the surface in the exact same point.
Sensofar Medical has successfully established statistical and structural parameters measurable from 2D images of the stent surface that consistently correlate with surface roughness parameters calculated from 3D measurements. Assessing the surface quality from 2D images provides valuable information about the device while not compromising inspection throughput
3D Modes
Overcome the limits of 2D imaging with Sensofar Medical’s non-contact 3D imaging technology.
SURFACE TOPOGRAPHY
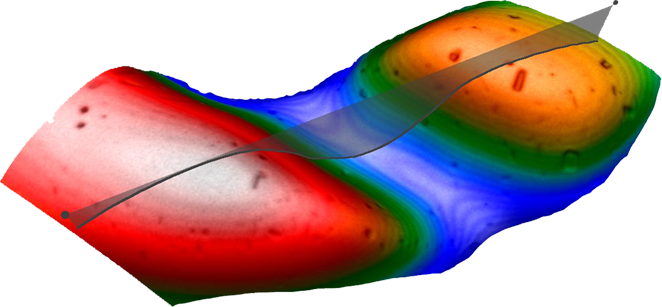
Measure the depth of surface defects
Measure the depth of a hole or a scratch in the stent surface. 3D Topography of a defect can be obtained in seconds with a lateral resolution of 0.5 microns and a vertical resolution of 1 nm.
SURFACE ROUGHNESS
Measure the surface finish after the polishing process
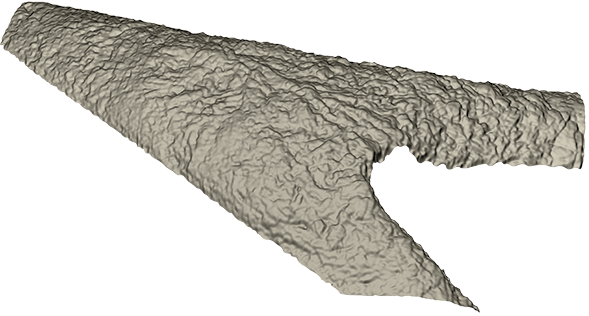
Characterize the quality of your electro-polishing process. Standard surface texture parameters are measured according to ISO 25178. The operator can select areas of interest in the outer surface of the stent as well as filtering parameters.
Characterize the quality of your electro-polishing process. Standard surface texture parameters are measured according to ISO 25178. The operator can select areas of interest in the outer surface of the stent as well as filtering parameters.
DRUG-ELUTING STENT COATING THICKNESS
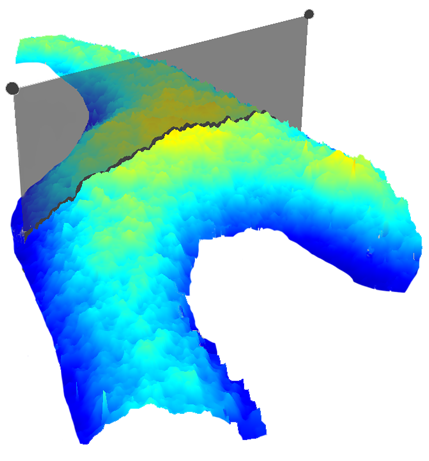
Measure the thickness of drug-eluting coatings
Check the performance of the coating process and characterize the coating uniformity. The thickness of optically transparent coatings is mapped across the width of the struts with a lateral resolution of 0.5 microns and a vertical resolution of 2 nm in just a few seconds. The minimum value of the thickness that can be measured is approximately 2 microns.
Automatic inspection routines
Operators using SensoINSPECT software in assisted mode can take fast and reliable decisions in terms of stent acceptance. Automatic inspection routines acquire the images needed for the inspection based on the settings pre-defined by a supervisor, and simultaneously analyzes the images according to the inspection requirements and visual standards configured.
Inspection Results are automatically generated and can be transferred to an external server, making the inspection process fully traceable.


