Design of an interferometric system for piston measurements in segmented primary mirrors
Design of an interferometric system for piston measurements in segmented primary mirrors full article
J. Arasa1, F. Laguarta1, C. Pizarro1, N. Tomas1 and A. Pintó1
1Universitat Politècnica de Catalunya (UPC) Rambla Sant Nebridi, 10, E-08222 Terrassa, Spain.
Proceedings Volume 4093, Current Developments in Lens Design and Optical Systems Engineering; (2000)
Event: International Symposium on Optical Science and Technology, 2000, San Diego, CA, United States
Abstract
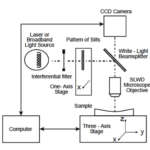
Recently, telescopes with segmented primary mirrors are becoming increasingly popular due to their ability of achieving large apertures without the inconveniences caused by the fabrication and handling of monolithic surfaces with 8m (or over) in diameter. The difference in position of each pair of adjacent segments along the local normal of their interface (called piston hereafter), however, needs to be precisely measured in order to provide a diffraction- limited image. If a system yielding the nanometric accuracy required in piston measurements worked in daylight hours, the resultant saving in observation time would be an important advance on a majority of the state-of-the-art piston measurement systems. An interferometric piston measurement instrument accomplishing such objectives has been designed starting from the usual Michelson configuration at the CD6 (Terrassa, Spain), and its final test has been carried out in the test workbench of the Instituto de Astrofisica de Canarias (IAC, Canary Islands, Spain). Its optical layout relies on projecting the reference arm of the interferometer onto one of the segments of the pair considered, along the direction of the local normal to the surface while the measurement arm is projected onto the interface which divides the pair of segments considered. The field of view and its illumination are calculated to be equivalent in both segments. The lateral shift of the fringes in both interferograms determines the piston error present. A combination of monochromatic and white light is used, in order to remove the (lambda) /2 phase ambiguities present in piston measurements without losing the required resolution in the measurement. In this paper, the optical design of this interferometric piston measurement instrument will be presented. The particular configuration used in the interferometer, the implementation of an imaging system allowing to see both the interface of the segments and the interference fringes, the effect of the extension of the source and the use of both monochromatic and whit light will be discussed. A detailed study of the wavefront errors embedded in the wavefront at different stages of the interferometer is performed. The analysis shows the validity of the design of the instrument, and some experimental results obtained at the test workbench are provided to demonstrate the ability of the instrument to perform nanometric piston measurements under daylight conditions.


